Recent Posts
The 5 key advantages of digital sewing patterns
Jun 02, 2023
How to assemble PDF sewing patterns
May 25, 2023
How to print PDF sewing patterns
May 25, 2023

How to assemble PDF sewing patterns
Once you have your printed pages, you can go and assemble them. Save time with our swift and easy 'corner method' in which you only trim the corners!
Below we also explain the traditional method of trimming the sides of the pages. Which method to use is totally up to you. Let us know in the comment section which one you prefer!
SIDE NOTE: We advise you to only print the size(s) you need, so you won't need to trace the pattern pieces onto a different sheet of paper. The pattern pieces do not overlap. So when you’re done assembling the pages, you can cut out the pieces straight away.
CORNER METHOD - fast and easy!
A4/US Letter
1. Trim all corners of the pages. Cut exactly against the corner point.

2. Check the tiled printing layout on one of the printed pages (you'll also find it in the instruction booklet) and organize the pages in small piles per row.


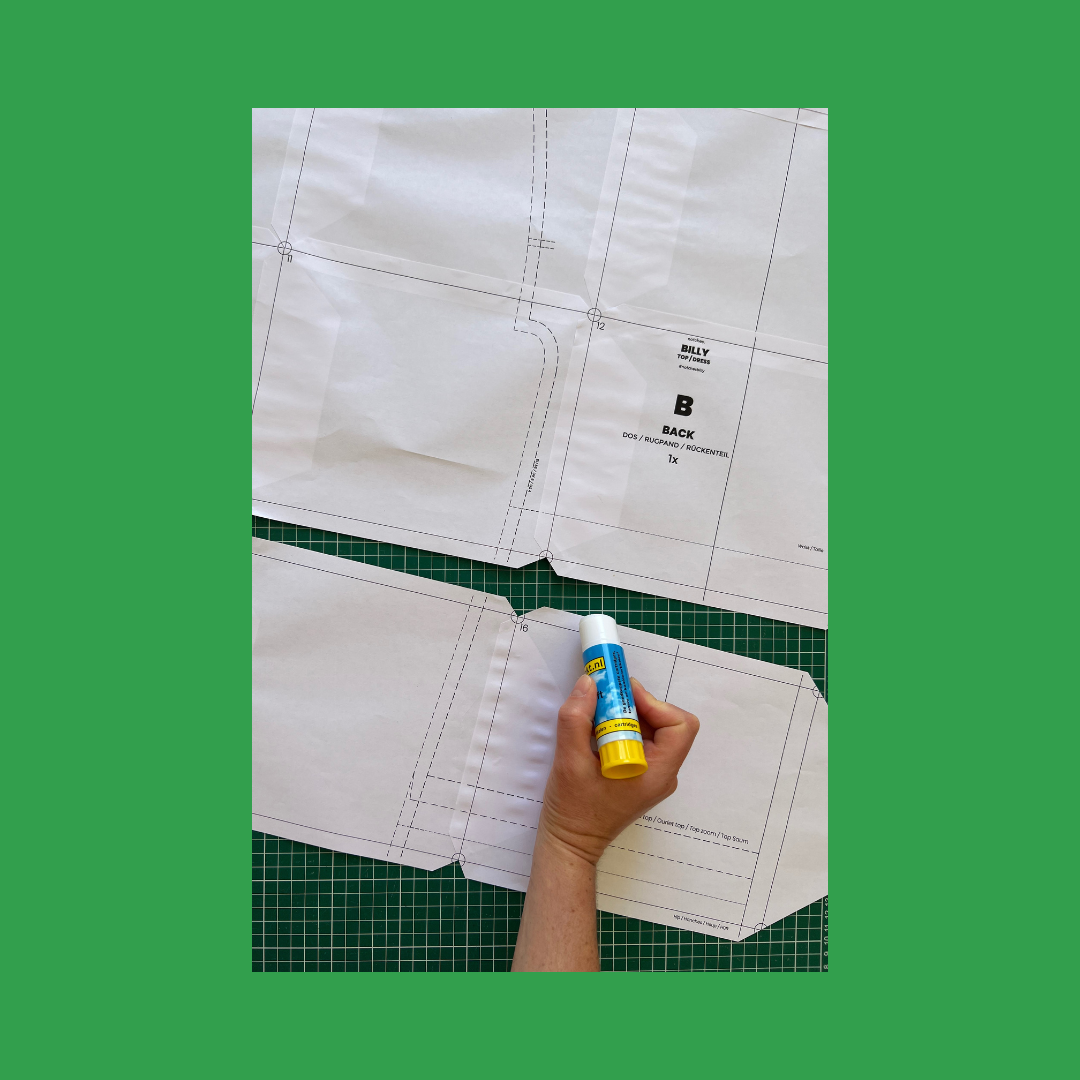
3. Assemble the pages left to right. You can use tape or glue stick. Position the corners accurately against each other, so that you get nice round circles.

TIP
Don’t put glue on both pages straight away. First, put some glue on the page that you’re going to put on top. This way you can adjust without too much frustration. Once you are satisfied with the positioning, fix the bottom overlap with glue.


4. Assemble all rows together top to bottom.

Double check that all corners have nice round circles.

5. If you want to make some adjustments to the pattern, now is the time!

6. Cut out the pattern pieces.

A0/Copy shop
The benefit of printing on large format is that you don't have too much cutting and assembling to do.
The method is the same as with A4/US Letter:
- Trim all corners of the pages.
- Assemble the pages top to bottom.
- Make adjustments to the pattern if desired.
- Cut out the pattern pieces.

SIDE METHOD
A4/US Letter
1. Trim the left side and bottom of the pages. (Except for the last row: you only have to trim the left side, not the bottom. And from the most left column: you only have to cut the bottom, not the left side)
TIP
Use a rotary cutter or guillotine cutter to make it go faster than scissors. Be careful cutting many pages at once as the pages may shift and accuracy will be compromised.

2. Continue with the same steps 2 to 6 of the corner method.


A0/Copy shop
Do the same, only with fewer pages ;-).
And that's how it's done, folks!
What to do next? Place these paper pattern pieces onto your fabric so you can start cutting the fabric. You can find different cutting layouts in the instruction booklet of the pattern if you need some assistance on how to position the pieces on the fabric.
← Older Post Newer Post →
You might also like
Scroll down to see more details about the fit, fabric, etc ...
WHAT YOU GET:
- All the pattern pieces and instructions to make at least 2 different variants, top and dress.
- Layered PDF A4, A0 and projector. With and without seam allowance.
- E-book with written and illustrated step by step instructions.
- Cheat sheet for an organised sewing practice.
LANGUAGE:
- The text on the pattern pieces is multilingual.
- The instructions are available in English and in Dutch.
CHOOSE YOUR LANGUAGE BEFORE ADDING TO CART
Size range: EU 34 - 56 / UK 6 - 28 / US 2 - 24
Scroll down to see more details about the fit, fabric, etc ...
WHAT YOU GET:
- All the pattern pieces and instructions to make at least 36 different variants.
- Layered PDF A4, A0, PROJECTOR. With and without seam allowance.
- E-book with written and illustrated step by step instructions, as well as links to video tutorials.
- Cheat sheet for an organised sewing practice.
LANGUAGE:
- The text on the pattern pieces is multilingual.
- The instructions are available in English and in Dutch.
CHOOSE YOUR LANGUAGE BEFORE ADDING TO CART
Size range: EU 34 - 62 / UK 6-34 / US 2- 30
Scroll down to see more details about the fit, fabric, etc ...
WHAT YOU GET:
- All the pattern pieces and instructions to make at least 64 different variants.
- Layered PDF A4, A0, PROJECTOR. With and without seam allowance.
- E-book with written and illustrated step by step instructions.
- Cheat sheet for an organised sewing practice.
LANGUAGE:
- The text on the pattern pieces is multilingual.
- The instructions are available in English and in Dutch.
CHOOSE YOUR LANGUAGE BEFORE ADDING TO CART
Size range: EU 92 - 176 / UK-US 2 - 16yr
Scroll down to see more details about the fit, fabric, etc ...
WHAT YOU GET:
- All the pattern pieces and instructions to make at least 46 different variants.
- Layered PDF A4, A0, PROJECTOR. With and without seam allowance.
- E-book with written and illustrated step by step instructions.
- Cheat sheet for an organised sewing practice.
LANGUAGE:
- The text on the pattern pieces is multilingual.
- The instructions are available in English and in Dutch.
CHOOSE YOUR LANGUAGE BEFORE ADDING TO CART
Size range: EU 34 - 62 / UK 6-34 / US 2- 30
Cup sizes: A to G


